WHAT IS AN OXYGEN SENSOR AND HOW DOES IT WORK?
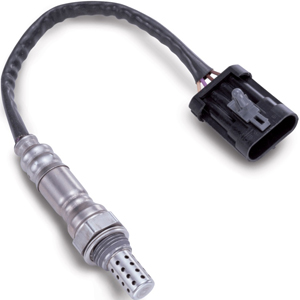
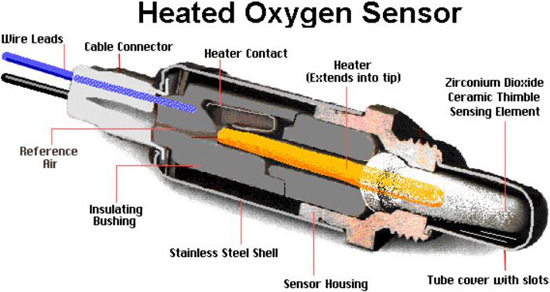
 An oxygen sensor (also known as an O2 sensor or Lambda sensor) is a sensor designed to generate a reading based on the content of oxygen in an automotive exhaust system. The sensor itself is made of a ceramic compound with porous-shaped electrodes coated in platinum, surrounded by a protective metal shell casing. O2 sensor casings are threaded, and the entire unit is designed to screw in until it reaches a half-in, half-out position on the exhaust pipe. Modern oxygen sensors are heated to ensure they reach operating temperature quickly.
 An oxygen sensor generates a voltage output reading by comparing the amount of oxygen in the exhaust gas to the amount of oxygen in the outside air. A rich fuel-air mixture with a higher concentration of hydrocarbons or unburned fuel in the exhaust causes an oxygen demand. As oxygen ions are naturally drawn toward the platinum-coated electrodes inside the sensor, voltage increases. Conversely, a lean fuel-air mixture with an excessively high oxygen content over hydrocarbons will cause oxygen ions to flow away the electrodes – resulting in a lower voltage reading. As outside air conditions change, resistance may vary.
HOW MANY OXYGEN SENSORS ARE REQUIRED ON A TYPICAL VEHICLE?
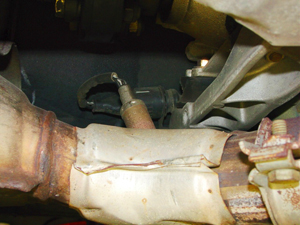
Front oxygen sensors are located in the exhaust system upstream of the catalytic converter, often deep in the engine bay. Front sensors are referred to as “Sensor 1” on scan tools.
Each exhaust pipe on a new vehicle sold in the United States is required to be equipped with a catalytic converter that converts harmful exhaust gasses into less harmful ones thanks to chemical reactions that occur inside of it. Each catalytic converter is also required by law to have one oxygen sensor mounted upstream of it, and one catalytic converter mounted downstream of it. As a result, single-exhaust vehicles will be equipped from the factory with two oxygen sensors and dual-exhaust vehicles will be fitted with four sensors.
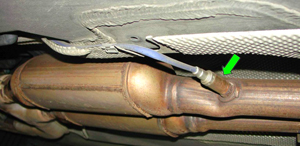
Rear oxygen sensors are located in the exhaust system downstream of the catalytic converter, and are referred to as “Sensor 2” on scan tools.
Two oxygen sensors per exhaust pipe allow a vehicle’s engine control computer to compare the cleanliness of the exhaust before it enters the catalytic converter to the exhaust after it exits. Not only does this provide the legally required self-check to monitor if one of the sensors should fail, it allows the efficiency of the catalytic converter to be watched.
With this information, the vehicle’s central engine control unit can offset rich air-fuel mixtures that are a natural result of cold engine starts. For the first 30 to 90 seconds before catalytic converters reach peak operating effectiveness, a secondary air pump on the vehicle activates to load the exhaust system with extra oxygen from outside air – ensuring overall emissions remain clean. Over time, excess unburned hydrocarbons passing through the exhaust system will foul oxygen sensors and catalytic converters both, shortening their lifespan and costing you big money in parts to replace.
DESCRIPTION OF OXYGEN SENSOR LOCATION
When displaying the location of oxygen sensors, scan tools will use terms such as “Bank 1, Sensor 2”. Inline engines only have one bank of cylinders, so all O2 sensors on such a vehicle will be known as Bank 1. V6 and V8 engines with two banks of cylinders will register as Bank 1 or Bank 2. The side of the engine will vary from make to make, but Bank 1 will always be located on the same side where cylinder number 1 is positioned. Sensor 1 will always be located before the catalytic converter, and Sensor 2 will always be located after it.
HOW CAN I GET THE LONGEST LIFE OUT OF MY OXYGEN SENSORS?
Oxygen sensors, like catalytic converters, are made of exotic materials inside which make them pricier to purchase. Extending the lifespan of these components can be done without any physical maintenance, so it makes sense to follow life-extending practices and get the most for your money. First, stay away from putting low-quality discount gasoline in your tank. You may save a little money up front, but the lower refining quality that brings bargain prices at the pump means more impurities passing through your exhaust system in the end. Over time, these will foul your emissions sensors.
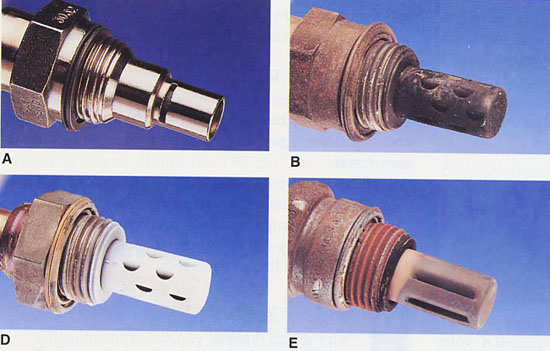
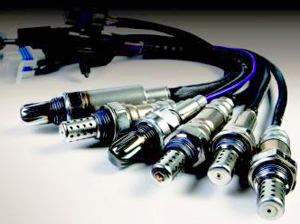
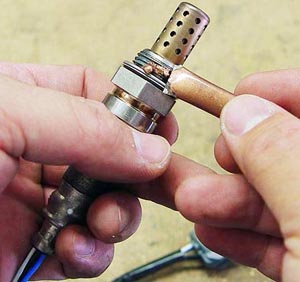
Shown in picture A is a new oxygen sensor. Picture B shows an O2 sensor fouled by oil, picture D shows a sensor fouled by excess carbon, and picture E shows an O2 sensor with normal wear.
Using fuel that’s lower in octane than your vehicle manufacturer recommends is also harmful to your exhaust system. Octane enhances the combustion process inside your engine to ensure fuel burns more completely without waste. Take away even some of the octane your engine needs, and you’ve got unburned hydrocarbons going out the exhaust where they foul O2 sensors and catalytic converters.
Performing regularly scheduled tune-up maintenance such as replacing engine spark plugs and air filters is a must. When spark plugs reach the end of their life span, they too can contribute to incomplete gasoline combustion and unburned fuel in the exhaust – leading to premature demise of your emissions equipment. Vehicles with worn piston rings that burn a lot of oil will also foul oxygen sensors more often.
REPLACING AN OXYGEN SENSOR
A scan tool with the ability to read engine fault codes will let you see exactly which oxygen sensor is faulty. While oxygen sensors on most vehicles are located in easy-to-reach spots on the exhaust system, some upstream sensors are tucked under the exhaust manifold – making them extremely awkward and difficult to reach. A good extension piece for your wrench will help if you need to reach down deep in the engine bay, and a specially fitted oxygen sensor socket will provide the best grip without damaging any attached wiring during removal and installation. You’ll want to let the vehicle cool off for a few minutes – burns from touching hot exhaust components tend to leave a mark.
Tools and equipment needed:
-Wheel chocks for placing behind rear wheels to keep vehicle from shifting or rolling back
-Vehicle jack or ramps (if extra clearance room will be needed)
-Wheeled creeper (for comfort working underneath the vehicle)
-Replacement oxygen sensor(s)
-Specially shaped and fitted Oxygen Sensor socket piece for your wrench
-Penetrating lubricant for loosening corrosion around threads of the old sensor
-Anti-seize compound for coating threads of new O2 sensor(s) being installed
After confirming the location of the O2 sensor needing replacement, drive the vehicle up on ramps if you’ll be working underneath it. Or, jack the vehicle up as needed and insert a jack stand or stands to support its weight. Make sure the gear selector is in park, the emergency brake is on, and wheel chocks are located behind rear wheels to ensure the vehicle stays still.
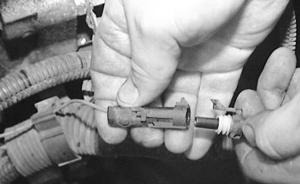 First unhook the wire connector of the faulty O2 sensor, then spray the metal threaded area with penetrating lubricant. While the exhaust system cools further, let the lubricant soak into the threads where it will loosen corrosion that normally makes the sensor to difficult to unscrew.
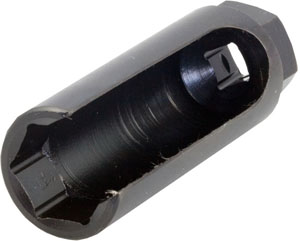
Specially shaped oxygen sensor sockets are highly recommended to provide maximum grip in tight spaces while preventing damage to sensitive components.)
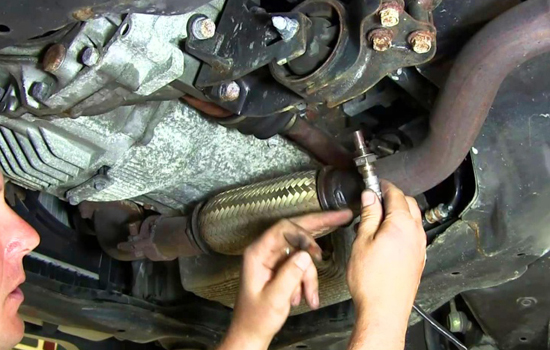
When the time is right, unscrew the old sensor from the exhaust system using a fitted socket. Clean the threads inside the hole and apply anti-seize lubricant in order to create a tight seal that keeps corrosion at bay and the elements out. Universal oxygen sensors may require snipping off a non-fitting connector they might have come with in order to splice the wires directly to the new sensor.
Install the replacement O2 sensor using the specially designed socket. If you’re installing the new sensor on a flange, use a new gasket before tightening. Snap the wire connector from the vehicle onto the new sensor, and you’re finished. A scan tool will clear any check engine fault codes generated by the malfunctioning sensor.
Before installing a new oxygen sensor, apply anti-seize lubricant on the threads in order to create a tight, corrosion-free seal.